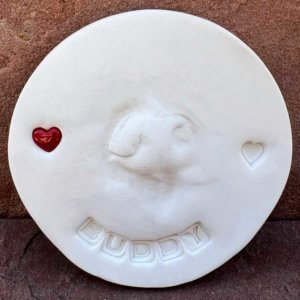
Did you know you can make a dog nose print mold using ClayPaws clay? ClayPaws clay is the premiere choice for making archival-quality paw prints of pets. However, it is not well known that this same trusted, proprietary clay formula can also be used to make beautiful nose prints.
This blog will walk you through how to create a dog nose print mold for your clients and customers to get a truly striking result. This method can also be used for other pets, like cats. Simply adjust the amount of clay used to make the initial mold.
Why Should I Make a Dog Nose Print Mold?
Before we jump into the directions, let’s take a second to talk about why people may want a nose print mold of their pet. Like paw prints, nose prints are completely unique to each individual animal. The lines, markings, and shape can be used to identify a specific animal. This means a cat or dog nose print mold is a very personal keepsake for a pet parent.
Pet parents are often very connected to their pet’s nose on an emotional level, as well. They kiss their pet’s nose, clean their nose prints off the windows, and see how their pet uses their nose to investigate the world. A cold nose may wake them up each morning or nudge them every time they want a treat. Because they see their pet’s nose every time they look at their pet, it may be a more visually recognizable part of their pet than even their pet’s paws.
Using the ClayPaws Brand Method
Giving a pet parent the chance to touch and feel the shape and texture of their pet’s nose forever is a truly meaningful gift. When you use our method, not only can a pet parent touch their pet’s nose print, but the print is actually a convex impression of the nose. Meaning, the mold of the nose extends out from the clay patty rather than being an impression that dips into the clay.
ClayPaws Clay is easy to work with, permanent once baked, captures amazing detail and won’t crack, curl, or deteriorate over time like most air dry clays.
Okay, let’s get to how to create this one-of-a-kind dog nose print mold:
- Before you begin, wash your hands well and dry with a paper towel as the clay will attract dirt, lint, and fur.
- To start, take a pinch of clay from a ClayPaws patty. The amount needed will vary depending on the size of the nose.
- Knead the clay until the clay is soft and warm. The longer you knead the clay, the easier it will be to work with. A couple of minutes should be sufficient.
- Roll the clay into a ball, then flatten into a round or oval disk that is about half-an-inch thick.
- Wipe the nose clean and pat dry with a paper towel.
- Press the clay disk onto the animal’s nose, applying even pressure and being sure to capture details from the top, bottom, and both sides of the nose. Note: If the animal is awake, use treats and recruit help to keep them still. Be gentle but firm with pressure as you make the mold.
- Remove the clay from the nose. Check that you have the impression that you want. If not, re-knead the clay and try again. Note: You can leave the mold naturally curved to capture the depth of the nose, or you can gently flatten the disk of clay, so the revers impression isn’t as deep.
- Bake the nose mold, impression side up, at 275°F for 20 minutes on a clean baking dish. Then let cool. Note: We strongly recommend using a separate oven thermometer to ensure the baking temperature is accurate. Bake at 295°F for high elevations.
- While the mold is baking, prepare a separate ClayPaws patty. Follow the included instructions from the ClayPaws Kit to knead the clay, roll it into a ball and shape and smooth using a Patty Pad & Circle Mold (optional).
- Once the nose mold is cool, hold it in your hand with the impression side up.
- Then, place the prepared patty of clay on top of the mold with the smoothest side down. Using your fingers, press the clay patty into the nose mold from behind. Press gently, but firmly, being sure to press clay into all areas of the mold.
-
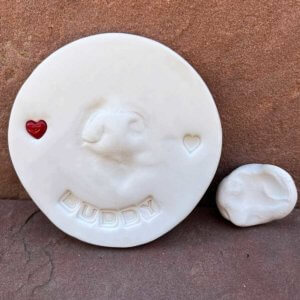
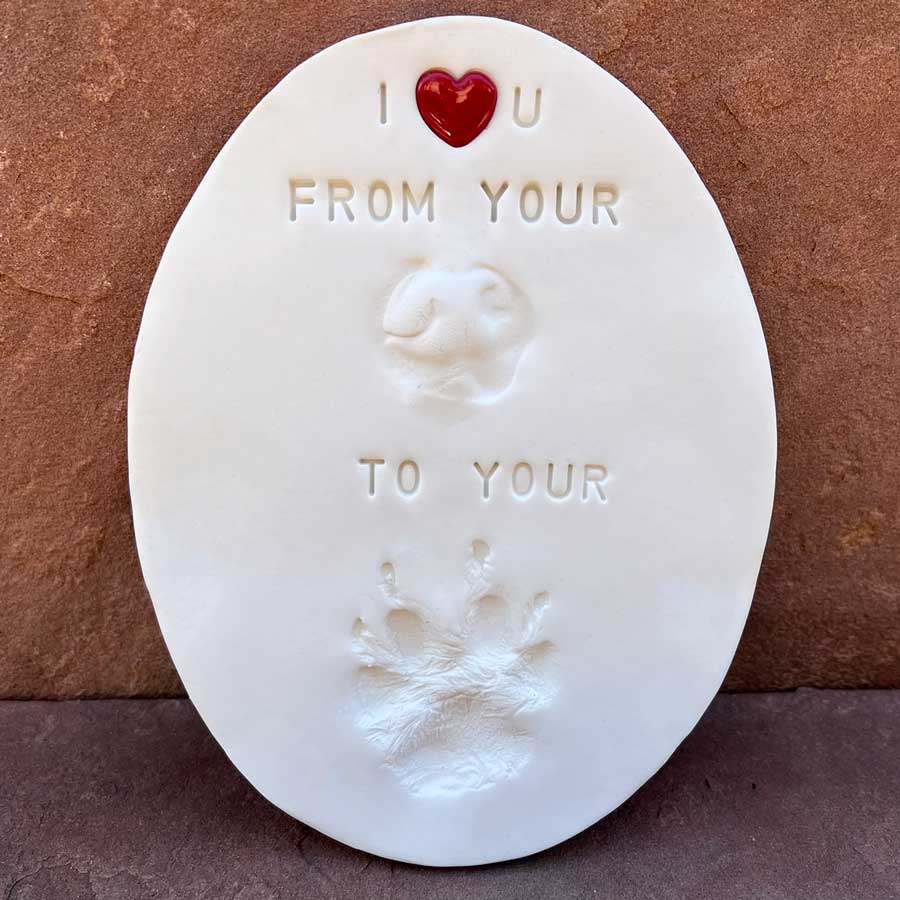
Finished Nose Print and Original Mold Remove the patty of clay from the nose mold to reveal the reverse impression of the nose print. Smooth out any imperfections. Note: If you’re not happy with the print, re-knead and shape the clay and try again.
- Before baking, plan out your decorations. Some decorations like stamps, holes for ribbon and decorative charms need to be done before baking.
- Then, bake the nose print mold on a clean baking dish for 20 minutes at 275°F or 295°F for high elevations.
- After baking, let the print cool. It will continue to harden and cure as it cools.
- Once it is cool, the nose print can be finished with decorations like ribbon and decorative markers.
- Then it is time to present the dog nose print mold to the family. Note: The original concave mold of the pet’s nose can be used to make jewelry or other mementos through third parties in the future, so be sure to also ask if the pet parent would like this secondary keepsake as well.
Be Creative!
You can be as creative as you want with these nose prints. With our decorations and variety of mold shapes like circles, ovals and hearts, the possibilities are endless.
For example, if you combine multiple patties of clay together and use our large circle, oval or large heart mold, you can include both a nose print and a paw print in the same keepsake.
You can also watch our instructional video on this topic, Making a Nose Print with ClayPaws Brand Clay.
Until next time,
Bryn Frisina
Chief Growth Officer
World by the Tail, Inc.


